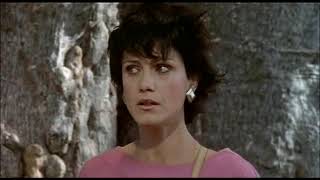
We'll take a look at how to transform a person (portrait image) into a stone statue or sculpture in Adobe Photoshop. You can expect a realistic, high-quality marble statue look. This is a bit more advanced, but still presented in a step-by-step format that is easy to follow along!
1-MIN TUTORIALS:
⌛ ALL 1-min tutorials on one playlist:
[ Ссылка ]
🟠 20 ILLUSTRATOR 1-min tutorials:
[ Ссылка ]
🔵 20 PHOTOSHOP 1-min tutorials:
[ Ссылка ]
NEW 1 MINUTE TUTORIAL EVERY WEEK! 🥳
This is part 36 of the Adobe Monday series, and parts 21 to 40 are all about Adobe Photoshop!
WANNA SAY THANKS?
It can be as simple as subscribing, but if you'd like, you can buy me a cup of coffee: www.paypal.me/zanstermecki
TIMESTAMPS:
0:00 | Intro
0:13 | 1 Min Tutorial
1:29 | Outro
TEXT:
First of all, you need to mask out a portrait out of the background and remove any details from it. That includes earrings, skin marks, or anything from clothes if they contain some kind of color print or anything visually similar. Go to image, adjustments, shadows and highlights, and apply a similar effect to the one I did, and is shown on the screen. Turn your photo black and white and remove eyebrows and pupils from the eyes. Remember that we're making a statue. Along the way, apply different adjustment layers to get similar results as seen on the screen - help yourself with the layers I have at any a given point, but don't necessarily limit yourself to that because every picture is different. Just try to get a similar look to what you see. Let's start smudging the whole picture because stone sculptures don't have all the details like pictures do. Adjust the brightness of specific areas using the brightness adjustment layers and masks. I made one for shadows and another layer for highlights. I also switched to a gray background to easier see what's going on. Add another pair of shadow and light layers where you use a brush tool for stronger highlights and shadows. Add marble texture using the color burn blending mode. I also grabbed a picture of a real statue, to use as a base for my own. Here, the important part is to find a spot that blends well. I also applied a color balance layer to the base to match it with the grays of my sculpture. Of course, a few more adjustment layers and another copy of marble texture, and I applied it to the base as well. Match the lighting of the base with your sculpture to seamlessly blend them together. I added a color balance adjustment layer to the top to get a slightly blue tint to the whole image to make it as cold as stone, and I finished it off by adding a shadow.
Program used: Adobe Photoshop
SUBSCRIBE if you want to see more and make sure to LIKE this video! 😊


![[SFM FNaF] Top 10 BEST FNaF vs Fight Animations 2024](https://s2.save4k.org/pic/p2t6WK635Zk/mqdefault.jpg)


