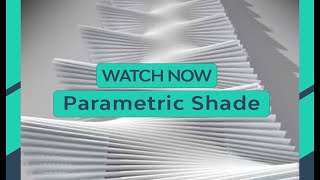
Learn how to use Railclone to create this kind of parametric shading structure.
You can use Railclone to create parametric models inside 3ds Max from simple objects.
––––––––––––––––––––––––––––––
• Arch-Viz masterclass ⬇️⬇️
Rural House Visualization Masterclass: [ Ссылка ]
––––––––––––––––––––––––––––––
• Follow the steps in this tutorial ⬇️⬇️
- Create a straight line.
- Create a box for the louvers.
- Create a Railclone object and open the style editor.
- Add a Linear 1S generator.
- Add a Spline to the editor, and choose the line from the scene, then connect it to the generator.
- Add a Segment, choose the box from the scene and plug it into the default input.
- Add a Transform operator after the segment.
- In the Deform tab, enable Override banking angle.
- Right click on transform and choose export parameters.
- Select Banking Angle in the Deform section and hit ok.
- Add an Arithmetic operator and two Numeric values.
- Rename the Numeric nodes to “Cycles” & “Amplitude”.
- Change the numeric type to ‘float’ and connect them to the Arithmetic node.
- Change the mode to ‘Expression’ and click on ‘Edit Expression’.
- Write this expression “return sin(XSplinePosition*Input1)*Input2;”
- Change the Cycles and Amplitude values to control the shape of the wave.
- You can change the spline to control the length and shape.
––––––––––––––––––––––––––––––
Instagram : [ Ссылка ]
Tiktok : [ Ссылка ]
––––––––––––––––––––––––––––––
#3dsmax #archviz #3d #3dtutorial #3dmodeling #procedural #parametricdesign


